 When you buy something using links in our stories, we may earn a small commission. Read more about our policy.
 When you buy something using links in our stories, we may earn a small commission.
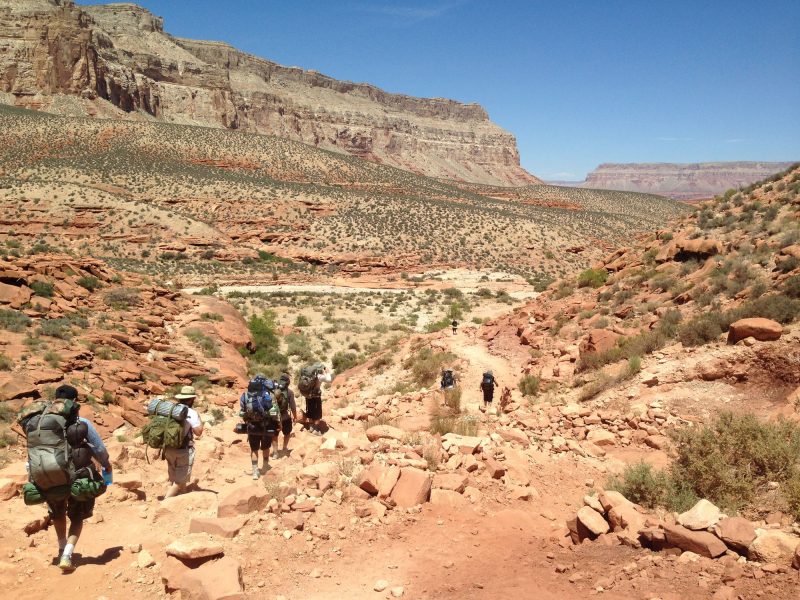
 With backpacking, it’s all about the ounces. Every precious ounce added to your pack—or built into it—matters. It’s also a balance, though, taking into account safety and comfort. When you’re in the backcountry, preparedness it the utmost priority, and you may also want a few creature comforts to make the experience as enjoyable as possible.
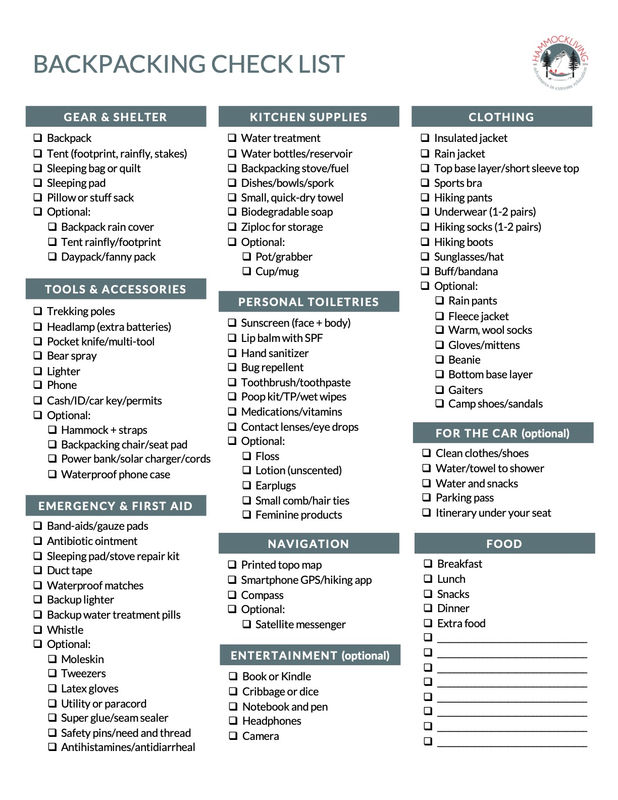
This backpacking list takes an in-depth look at all the essential gear needed, as well as some common optional items. It details the big, necessary things like a backpack and tent (and what to consider when buying), as well as the finer details. This list includes all the smaller items you’ll need to bring along like a lighter and sunscreen, plus everything you need for eating well in the wilderness. This printable PDF is also a handy tool to make sure you don’t forget anything before leaving home.
In general, backpacking is a great way to get back to basics. You’ll be surprised at how little you need to survive in the wilderness—and in life. It’s a great feeling returning from a backpacking trip and having survived on the stripped down bare necessities, and it’s something you can carry into everyday life.
The 10 essentials
The 10 essentials is a great place to start when it comes to backpacking, hiking, camping, etc. This is the industry standard and go-to packing list anytime you’re venturing outside. For backpacking, though, it’s worth taking a closer look at each of the categories listed below. I’ve organized this list by essential gear and optional items—some nice-to-haves—depending on your needs for protection and pampering.
Tips for reducing weight
- Pack only what you need, carefully considering each item. A few ounces here and there quickly adds up to a few extra pounds! This goes for gear and food.
- For the big, essential items, you get what you pay for, and typically that’s measured in weight. For lighter gear, you’re going to spend a bit more, but it’ll be well worth it after days carrying it on your back. This goes for backpacks first and foremost, as well as tents, sleeping bags or quilts, and sleeping pads. Lightweight gear is worth its weight in gold on long treks. You can save some serious pounds by investing in this gear right off the bat, and it’ll make your trips much more enjoyable. That said, outdoor gear isn’t cheap, so decide what’s most important to you now and build your collection over time if needed.
- Know your pack weight. While choosing gear (or to find out the total weight of your backpack before heading out) use LighterPack.com to input all of the items you’re considering buying (or have in your pack).The website spits out a fun little pie chart breaking down categories like pack, sleep, shelter, kitchen, electronics, consumables, clothing, and miscellaneous items. You may be surprised seeing it all measured out like this and find ways to cut down the total weight.
Printable backpacking checklist (click to download PDF)
Gear and shelter
Optional
- Backpack rain cover
- Tent rainfly
- Tent footprint
- Daypack / fanny pack
Sleep systems
Essential
- Sleeping bag or quilt (with stuff sack)
- Sleeping pad
Optional
- Pillow or stuff sack
Tools and accessories
Essential
- Trekking poles
- Headlamp (and extra batteries)
- Pocket knife or multi-tool
- Lighter (to start fires or if you stove igniter breaks)
- Bear spray
- Phone
- Cash, credit cards, ID, insurance card, car key, permits
Optional
- Lightweight hammock
- Backpacking chair
- Seat pad
- Power bank or solar charger (and charging cords)
- Waterproof phone case
- Camera (and waterproof case or Ziploc)
- Ice axe / microspikes
Kitchen supplies
Essential
- Backpacking stove and fuel
- Dishes / bowls
- Spork
- Small, quick-dry towel
- Biodegradable soap
- Ziploc for garbage
Optional
- Pot (and grabber)
- Cup or mug
Hydration
Essential
Food
Essential
- Yes, food is essential (see below)
Clothing for the climate
Essential
- Insulated jacket
- Rain jacket
- Top base layer
- Short sleeve shirt or tank top
- Sports bra for the ladies
- Hiking pants / shorts
- 1-2 pairs of underwear
- 1-2 pairs of hiking socks
- Hiking boots or trail running shoes
- Sunglasses and hat
- Bandana or Buff
Optional
- Rain pants
- Fleece jacket for layering on cold nights
- 1 pair of warm, wool socks for nighttime
- Gloves or mittens
- Beanie
- Bottom base layer (long underwear)
- Gaiters
- Camp shoes or sandals
Personal toiletries
Essential
- Sunscreen
- Lip balm with SPF
- Hand sanitizer
- Bug repellent
- Toothbrush and toothpaste
- Poop kit
- TP / wilderness wet wipes
- Prescription medication and vitamins
- Contact lenses and supplies
- Feminine products (for the lucky ladies)
Optional
- Floss (let’s be real)
- Lotion (unscented to not attract wildlife)
- Eye drops
- Small comb
- Hair ties
- Ear plugs
Navigation equipment
Essential
- Topo map
- Smartphone GPS / hiking app
- Compass (and know how to use it)
Optional
- Satellite messenger / communication device
Emergency/repair kit (gear) and First Aid kit (humans)
Essential
- Band-aids of various sizes
- Antibiotic ointment
- Gauze pads
- Repair kit for sleeping pad and stove
- Duct tape
- Waterproof matches
- Backup lighter
- Backup water treatment pills (Chlorine Dioxide)
- Whistle
Entertainment
Optional
- Book or kindle
- Cribbage or dice
- Notebook and pen
- Headphones
- Camera
- Compact binoculars
Pack for the car
Essentially optional
- Clean clothes and shoes to change into
- Gallon of water for trailhead shower
- Camp towel to dry off
- Water and snacks to rehydrate and replenish immediately
- Parking pass
- Itinerary in your middle console or under your seat
Backpacking gear and shelter
These are your barebones basics to carry your gear and get a good night’s sleep. Depending on weather, you may want to consider a few optional items like rain protection for your gear and a daypack. Some people bring smaller daypacks to take on hikes during a backpacking trip. Personally, I’m not a fan of daypacks because it’s a lot of extra weight. Another option is a lightweight fanny pack to carry the absolute essentials if you’re going to be doing short day hikes during your backpacking trip.
Optional
- Backpack rain cover
- Tent rainfly
- Tent footprint
- Daypack / fanny pack
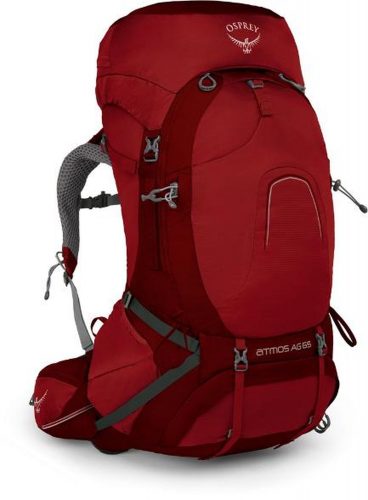
Backpack
Don’t be overwhelmed by the choices in backpacks. Every top brand sells numerous models and sizes. When it comes to backpacking packs, here’s what you need to focus on first:
- Size and carrying capacity. Most backpackers choose a pack between 40 and 75 liters. Lightweight backpackers keep it between 40 and 50L. Depending on how far you’re hiking, you may opt to carry more—or less—supplies and food. Say you’re going on a leisurely trip with minimal miles each day, you may opt for a larger/heavier bag and bring some extras like a hammock, book, etc. If you’re headed out for an ass-kicking trek and need to pare down to just the essentials, a smaller, lighter pack is your best bet.
- Weight. The lightest packs without much frame support start at around 1.5 lbs. These are for the serious lightweight backpackers. Most well-made packs with support are in the range of 2.5-4 lbs.
- Frame. If you’re new to backpacking and concerned about how the weight will carry on your back and shoulders, opt for a bag with good structural support, a sternum strap, and padded shoulder straps and hip belt.
- Try before you buy. Go into a store to get measured and try on several brands and styles before committing to a backpack. In the meantime, REI has a guide on how to measure your torso to find the right pack.

Tent
When it comes to backpacking, the options for lightweight tents are plentiful. Typically you will want a tent between two and five pounds (including tent poles). Depending on your needs and budget, some things to consider:
- One or two person? Look at the interior size, doors, and vestibules to determine what you need.
- Two or three season? What weather conditions will you be backpacking in? How versatile does your tent need to be? The more protection it offers, the more it’ll weigh. Perhaps invest in a lighter, summer tent and a second heavier tent for backpacking in cooler temps.
- Durability and ease of setup. You want a tent that will stand the test of time (especially when properly cared for) but won’t take a lifetime to set up when you’re exhausted after hiking all day.
- Tent accessories. Make sure to pack your tent’s poles, stakes, and guy lines.
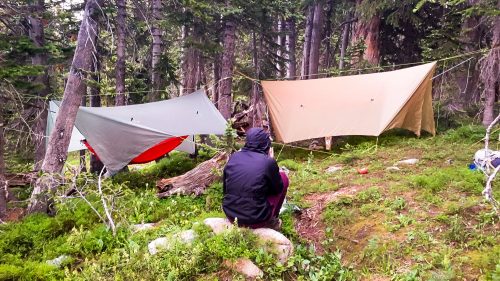
Hammock camping
Hummingbird makes some of the best lightweight hammocks for backpacking and hammock camping. Available in four sizes, these hammocks start at just 7.6 oz and can hold up to 350 lbs. They’re made with durable parachute nylon and take minutes to assemble. Hammocks are a great alternative to tents and can be used with rain tarps and bug nets for total protection from the elements.
Backpacking sleep systems
Sleeping bags or quilts are another important investment in your backpacking kit. You’ll want something lightweight that also provides enough warmth and is rated to the temperature you’ll be sleeping in. There are many options when it comes to sleeping pads, too, with a few that stand out from the rest.
Essential
- Sleeping bag or quilt (with stuff sack)
- Sleeping pad
Optional
- Pillow or stuff sack
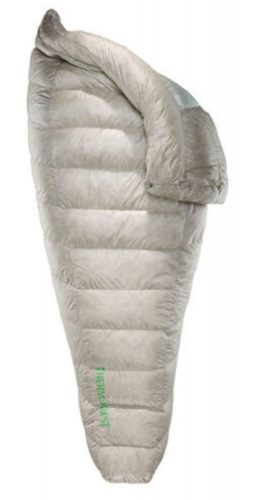
Sleeping bag or quilt (with stuff sack)
Your sleeping bag may be your most important investment. Getting good (and warm) sleep is essential to human health and happiness everyday but especially on the trails. A quality sleeping bag that’s well cared for can last for years.
However, quilts are quickly becoming the preferred nighttime companion for backpackers. Even lightweight sleeping bags have a thin backing that doesn’t provide warmth or protection, so it’s essentially wasted weight. Quilts, on the other hand, save some ounces and still offer just as much warmth.
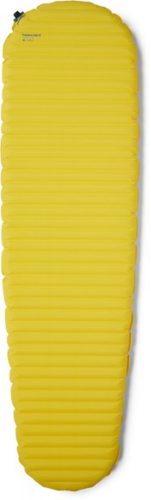
Sleeping pad
A good sleeping pad is essential. I know, I keep saying that, but it’s true. It’ll help keep you warm by creating a physical barrier between your body and the cold ground beneath, while holding the warm air inside. Therm-a-Rest makes lightweight and durable pads that are a favorite among backpackers.
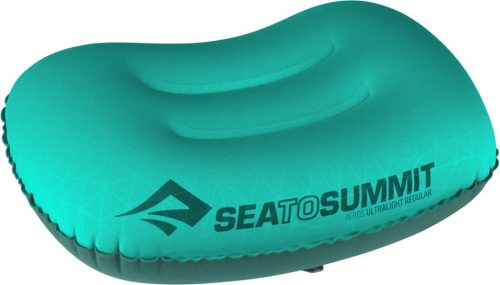
Pillow (or stuff sack)
A pillow can be a lifesaver for some people, but others prefer not to add the extra weight to their backpacking kit. Pro tip: another option is so put extra clothes into a stuff sack and use that as a pillow. It really depends on your preference and how well you sleep with—or without—a proper pillow. Usually I’m too tired to care.
Tools and accessories
There are a lot of fun gadgets you can bring along to make backpacking more comfortable and enjoyable—like a hammock. And there are some absolute necessities you’ll need to bring—like a headlamp.
Essential
- Trekking poles
- Headlamp (and extra batteries)
- Pocket knife or multi-tool
- Lighter (to start fires or if you stove igniter breaks)
- Bear spray
- Phone
- Cash, credit cards, ID, insurance card, car key, permits
Optional
- Lightweight hammock
- Backpacking chair
- Seat pad
- Power bank or solar charger (and charging cords)
- Waterproof phone case
- Camera (and waterproof case or Ziploc)
- Ice axe / microspikes
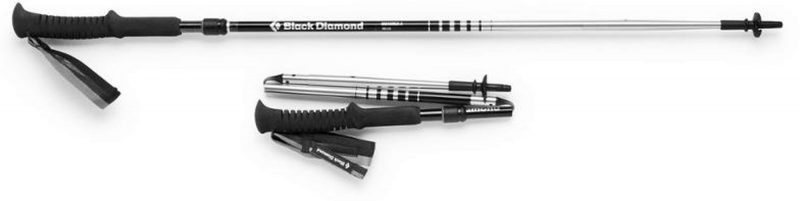
Trekking poles
You may not think you need these, but trekking poles are highly recommended for backpacking. They take pressure of your lower body (particularly knees and feet) and are clutch when going down steep or rocky terrain. I once sprained my ankle on a hike and I have trekking poles to thank for getting me out of the woods.
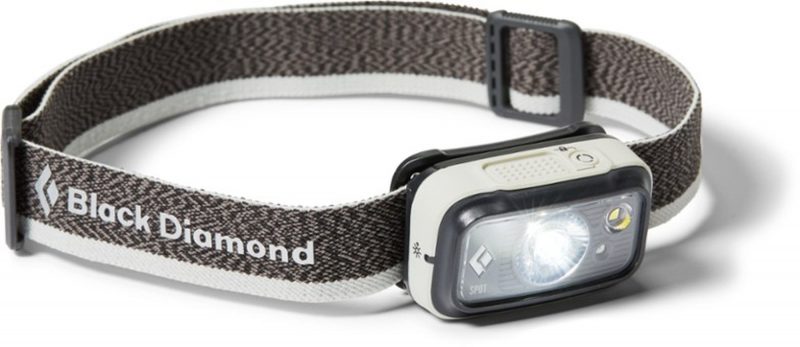
Headlamp (and extra batteries)
This is the most handy piece of equipment that is absolutely necessary for setting up (or simply navigating) camp in the dark. There’s no shortage of affordable, well-made headlamps. Just check the lumens (brightness) and battery life. And because you do not want this thing quitting on you when you’re backpacking, check the batteries beforehand and/or pack backup batteries.
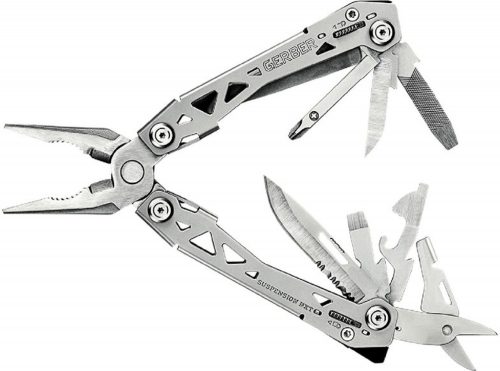
Pocket knife or milti-tool
This will come in handy more often than you think – whether you need to open the salami and slice the cheese or make a quick gear repair.
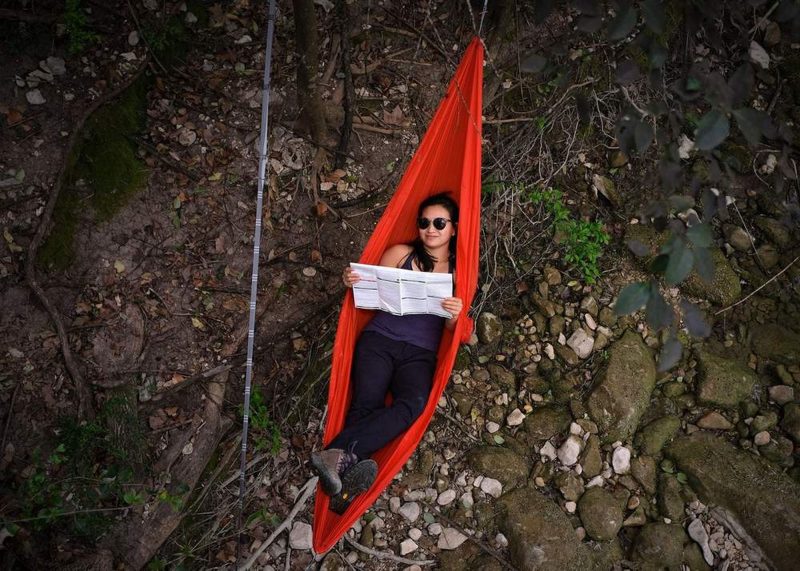
Lightweight hammock
Kammok‘s ultralight hammock is a great companion for backpacking trips, clocking in at just 5.6 oz. It is suspended with an ultralight toggle-and-loop system, and it packs into itself taking up just 3.25 in × 5.25 in. It’s very durable and made with water resistant fabric.

Backpacking chair
If you’re like me and need a comfy place to put your bottom after hours of walking, you’ll gladly add the extra pound for a cozy seat. You might think you’re fine sitting on rocks or a log, but the added back support and soft place for your butt is well worth it (IMO). When packed down, it easily fits into a backpack’s water bottle holster or can be attached by a strap on the outside. It takes maybe 10 seconds to setup, so anytime you’re having a proper snack break, you’ll be busting it out. And at camp in the evenings, you’ll be so glad to have it.
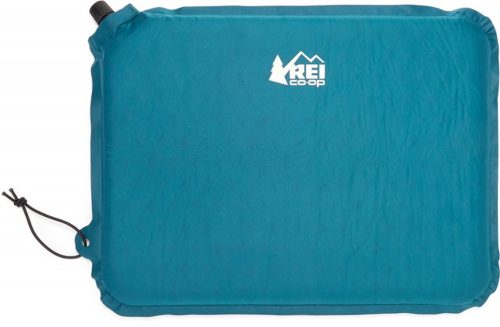
Seat pad
Another option for comfortable seating, a seat or sit pad is cheaper and less weight than a chair (and slightly less weight than the hammock) but doesn’t offer the same back support. And, you’re still on the ground. Available as blow-up or foam pads, they’re still a nice option for some seated relief.
Kitchen supplies
Some of the essential items listed here are still technically optional. For example, if I’m going on a short backpacking trip, I might forgo dish soap and wipe my dishes after each use and give them a good, thorough cleaning when I’m back home. Depending on what you’ll be eating, you might not even need a dish or bowl. If breakfast is a bar, lunch is crackers/meat/cheese, and dinner is out of a dehydrated bag—voila.
Essential
- Backpacking stove and fuel
- Dishes / bowls
- Spork
- Small, quick-dry towel
- Biodegradable soap
- Ziploc for garbage
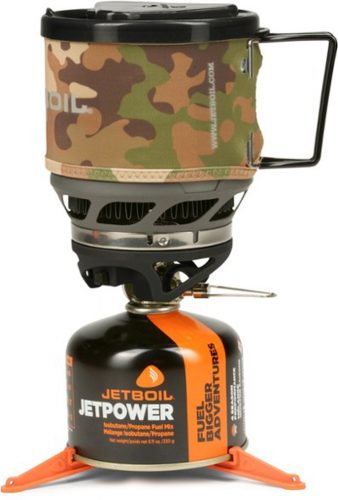
Backpacking stove and fuel
Backpacking stoves make cooking in the wilderness quick and easy. JetBoil rules the market, allowing you to boil water in less than five minutes (even in temperatures as low as 20°F) with great stoves starting around $100. Another nice option is the MSR PocketRocket Stove Kit that serves two for the weight of one.
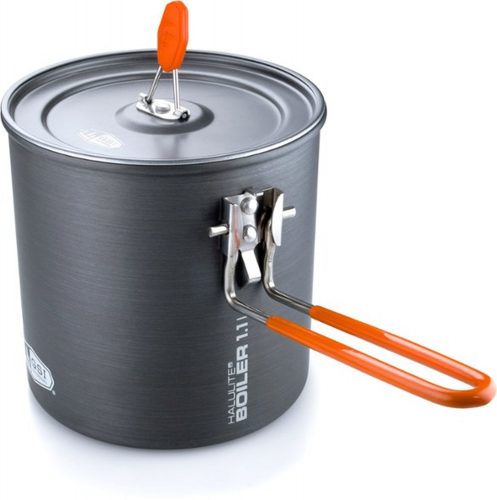
Pot (and grabber)
If you’re planning to eat most of your meals in a bag (dehydrated meals), a pot isn’t necessary. But if you plan to make other food and need to heat things up, there are several options for lightweight cookware.
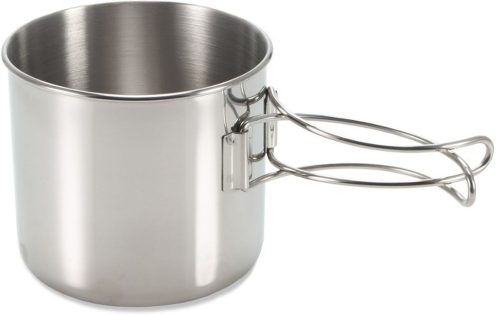
Cup/mug
This is on the optional list because some people don’t want to be bogged down by the convenience of a coffee (or wine) cup and stick to their water bottles, and that’s perfectly fine. I enjoy a cup of coffee in the morning so always have a small, lightweight mug. If I’m bringing booze, it’s also handy to have a separate cup. Typically I don’t like drinking when backpacking because I hate getting up to pee in the middle of the night, but there is a lot to say for having a glass of wine or whiskey after a long day on the trail or around the fire with friends.
Hydration (water bottles and water-treatment systems)
There’s no essential and optional list when it comes to water. It’s all essential—just pick a treatment system that works for you. I know, I keep saying everything’s important (backpack, tent, sleeping bag, food), but clean drinking water IS REALLY IMPORTANT, TOO. Water is life, and without it you’re…
There are several ways to get clean, safe drinking water in the wilderness. Some simply filter water and others provide full water purification, which you’ll want in more crowded areas where animal or human waste may be prevalent.
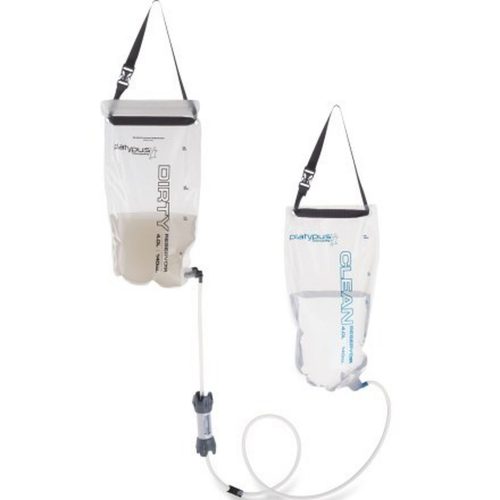
Water treatment
- Gravity filters – Simply fill the bag with dirty water and hang it from a tree branch or rock and let gravity take over. The water makes its way down through the filter, filling your bottle with clean drinking water. The downside is that it’s not as fast as some of the other techniques and requires something to hang it from, but this is a popular method for backpacking.
- Squeeze filter – These lightweight filters are as simple as filling a bag and squeezing out clean, drinkable water—right into your mouth or into a larger water bottle. *Manual labor (squeezing) required.
- Straw filters – Perhaps the lightest option, this 2 oz straw lets you sip right out the water source If need be. It seems gross, but it’s amazing. And totally safe.
- Chemical drops – Chlorine dioxide pills or drops kill more than 99.9% of bacteria without discoloring the water or giving it a funky flavor.
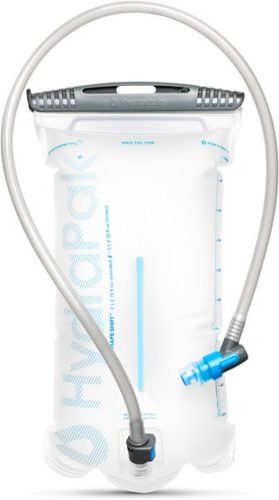
Water bottles or hydration reservoirs (at least 2)
Now that you have clean water, how will you store it? Water sources may be scarce on the trail (and this is definitely something you’ll want to research ahead of time), so it’s imperative to have enough water for the day—or days—until you’re able to refill. I like a mix of BPA-free plastic water bottles (stainless steel is another good option) and a collapsable water bladder, which takes up less space when not full and has an attached straw, which will undoubtedly encourage you to drink often and stay hydrated.
Food (and extra food)
Bringing not just food but extra food is one of the 10 essentials. In case you run into trouble and end up staying out longer than planned, you should have some spare nutrients.
Meal planning is essential, and it’s fun. Once you have all your gear purchased and ready to go, food prepping just may be the most time consuming part of preparing for each backpacking trip. Proper planning helps you keep your food weight down and ensures you have enough to last the entire trip. You should plan for 2,500-3,500 calories per day.
What you pack will depend on what you like to eat and how much cooking you’re willing to do, and perhaps other factors like nutritional value and caloric density if that’s important to you.
Packaged freeze-dried meals are your friend. Not all of them taste great, but some really do, and regardless, it’ll all seem like a gourmet meal when you’re tired and hungry. Dehydrated food also means less cooking and no dishes since you just boil the water and pour it into the bag (and then eat right out of the bag). Gourmet, right?
Dehydrated meals also come as breakfast foods. Oatmeal is another easy, hearty, and healthy option, and you can glam it up with some raisins or cranberries.
Other favorite backpacking foods include: pasta, instant potatoes, beans (but ditch the heavy cans), minute rice, crackers, cheese, salami, energy chews, trail mix, and nutrient- and calorie-dense bars. Fresh food is always a nice touch and so, so refreshing on the trail. Fruit is a real treat, and carrots typically last a few days.
Depending on how long you’ll be out, you might get sick of pre-packaged or bland foods. Small packets of salt, pepper, mayo, mustard, ketchup, hot sauce, etc. can be nice for adding some flavor if you’re really seeking luxury dining in the wild.
Important: Depending on where you’re hiking, you may not need a bear canister. They are required by law in some places, so find out ahead of time. And if you don’t want to purchase one, they are also usually available for rent from a nearby outdoors store.
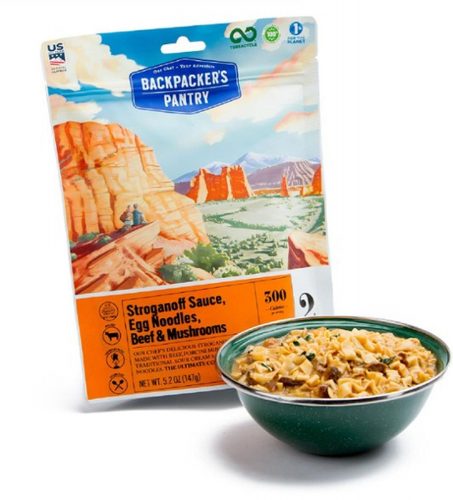
Dehydrated meals
With countless meal types available, it’s as easy as adding boiling water, and you’ve got a five-star meal in minutes.
Clothing for the climate
At a bare minimum, plan on one outfit for daytime/hiking and one dry/warm outfit for evening/camping/sleeping. Depending on how long you’ll be out, you may want to bring an extra shirt, underwear, and/or socks. I don’t mind wearing dirty clothes for days on end, and I always make sure my clothes are well-fitting and comfortable before hitting the trail. Some things to keep in mind:
- Necessary clothing and layers will depend greatly on where you’re headed, in what season, and for how long.
- Regardless, you want quick-drying fabrics that wick away moisture and help your body regulate temperature, staying comfortable in both warm and cool environments.
- Avoid cotton. This is a rookie mistake. Cotton absorbs and holds moisture (and odor), which can mess with your temperature and cause chafing and blisters.
- The best materials for backpacking and general outdoor clothing are: wool, bamboo, silk, polyester, and nylon. These synthetic blends keep you warm/cool and wick away moisture quickly without holding it in.
- Fleece will keep you comfy and warm but it doesn’t breathe very well, so it’s best to wear these layers at camp.
- Rain gear is essential, even if rain isn’t in the forecast. Climates can change quickly, and getting soaked when you aren’t ready for it can not only be uncomfortable but can be a serious health risk. Rain gear should be lightweight and breathable.
- Treat clothing with permethrin (bug repellent) before heading out.
Essential
- Insulated jacket
- Rain jacket
- Top base layer
- Short sleeve shirt or tank top
- Sports bra for the ladies
- Hiking pants or shorts
- 1-2 pairs of underwear
- 1-2 pairs of hiking socks
- Hiking boots or trail running shoes
- Sunglasses and hat
- Bandana or Buff
Optional
- Rain pants
- Fleece jacket for layering on cold nights
- 1 pair of warm, wool socks for nighttime
- Gloves or mittens
- Beanie
- Bottom base layer (long underwear)
- Gaiters
- Camp shoes or sandals
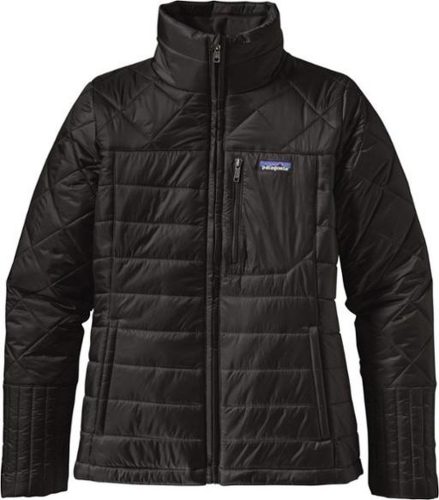
Insulated jacket
Your jacket should be lightweight, packable, and insulated with either natural or synthetic material. A hood can come in handy, too. Natural fibers like down will offer the best warmth-to-weight ratio and pack down to next to nothing but do not hold up against rain. Pairing a lightweight raincoat does the trick. Synthetic jackets are bulkier but insulate better when they get wet.
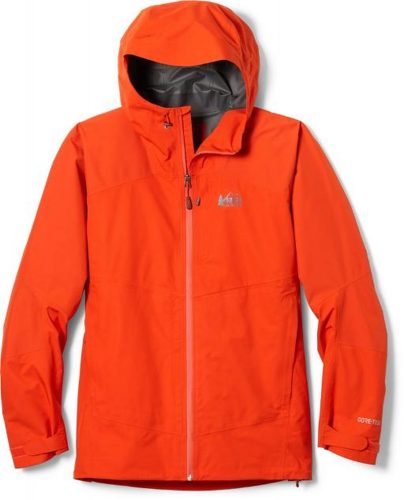
Rain jacket
I always bring a rain jacket even if the forecast isn’t calling for rain. They’re lightweight so not too much trouble to carry, and can really come in handy if you find yourself in wet or windy conditions.
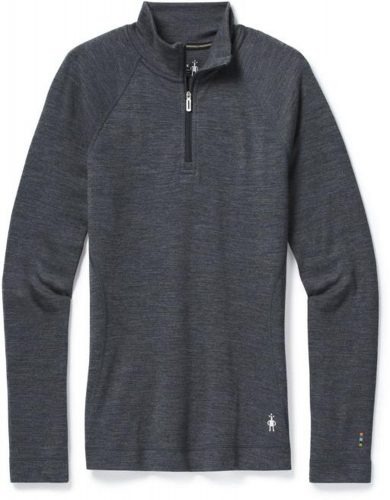
Top base layer
A long-sleeved shirt is clutch not just for keeping warm but also sun and bug protection. This is also your cozy camp outfit for nights and will keep you warm while sleeping. I prefer a quarter-zip because I also get hot easily and want to be able to ventilate at a moment’s notice.
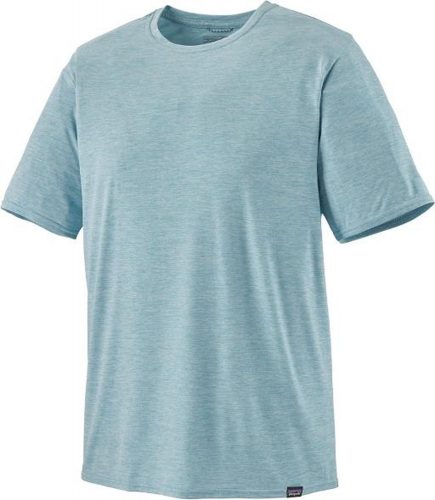
Short sleeved shirt or tank top
There is no shortage of lightweight, moisture-wicking, quick-drying t-shirts out there. I prefer tank tops, but if you’re looking for more sun protection, a short-sleeved shirt will keep your shoulders out of the sun, and a full long-sleeved shirt will alleviate even more concerns over getting sun burned.
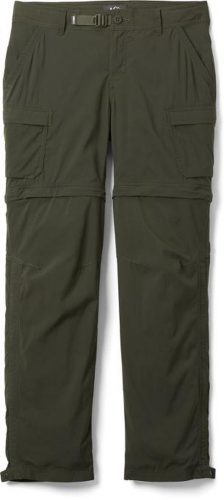
Hiking pants or shorts
I like hiking pants that zip off into shorts or capris so I have more options depending on the weather (cooler mornings and evenings with hotter mid-day temps is a perfect example). Ladies, it may seem tempting to wear your favorite leggings on a backpacking trip. Do not do that. Bring them to sleep in if you’d like, but they aren’t made for miles upon miles of walking. I’ve made the mistake of wearing leggings on long day hikes and inevitably end up chafing and hating life. Lightweight, quick-dry hiking pants or shorts may not be as flattering but you’ll feel so much better.
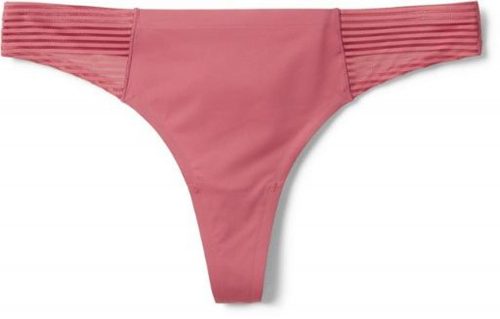
Underwear
When it comes to hiking underwear, ExOfficio is my go-to. They make various styles for men and women, including thongs—because even in the backcountry, no one wants panty lines. REI also makes great options. Whatever you choose, make sure they’re lightweight and quick-drying (sick of hearing those words yet?).

Hiking socks
Check out this guide to the best hiking socks for women. Men, the same rules apply to you. Find a height you like and make sure they’re wool, and you’ll be good to go. It’s also important to try your boots on with your socks. Thick socks can really alter a shoe’s fit.
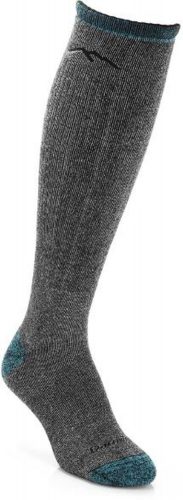
Thick, warm wool socks
I like to bring an extra pair or heavy duty (knee-high) wool socks for camp and sleeping.
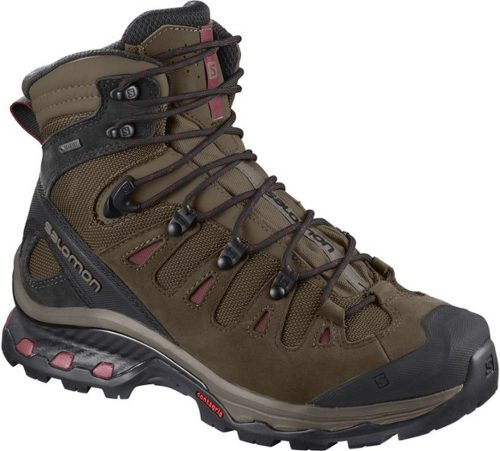
Hiking boots
Hiking boots are another critical piece to the backpacking puzzle. Depending on what type of hiking and mileage you’re putting in, there are varying degrees of support. Ankle support is pretty much a necessity when carrying heavy packs. Definitely wear your boots in well before you hit the trails and bring along Moleskin just in case you start getting blisters.
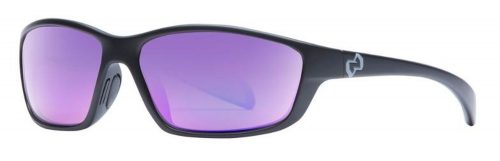
Sunglasses and hat
Sun protection is one of the 10 essentials, and both of these items fall into that category. I like polarized sunglasses and trucker hats or baseball caps, but wide brimmed sun hats are also great for keeping the sun off your neck (even if they don’t look as cool).
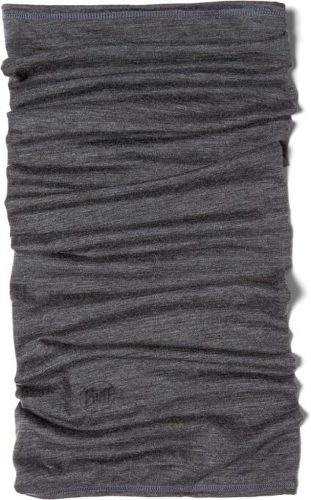
Bandana or Buff
This is technically optional, but because it can prevent sun damage and keep you warm, let’s go ahead and call it an essential. Buffs are very versatile and can also keep dust out of your face, nose, and throat. They can be worn as a face mask, balaclava, headband and protect your neck from the sun.
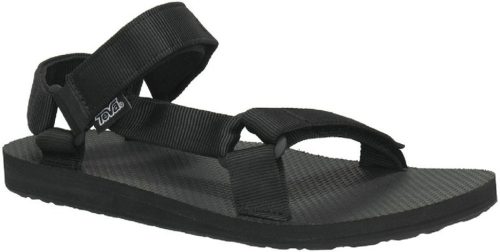
Camp shoes or sandals
While this may be optional for most, it’s a necessity for me. After a long day on the trails, my feet need a break from the boots. You’ll see a lot of Tevas and Chacos in the wilderness. There are several lightweight options that provide structure and padding, making the sock and sandal combo better than ever.
Personal toiletries
Essential
- Sunscreen
- Lip balm with SPF
- Hand sanitizer
- Bug repellent
- Toothbrush and toothpaste
- Poop kit
- TP / wilderness wet wipes
- Prescription medication and vitamins
- Contact lenses and supplies
- Feminine products
Optional
- Floss (let’s be real)
- Lotion (unscented to not attract wildlife)
- Eye drops
- Small comb
- Hair ties
- Ear plugs

Poop kit
Your poop kit will include a trowel, toilet paper, and Ziploc bag. Leaving no trace means digging a hole 6-8 inches deep for your #2s. A trowel is essential for digging (don’t think you can just wing it with a branch or rock), and remember to pack out your used TP. Toss it in a Ziploc bag and hide it inside another bag that is any color but clear.
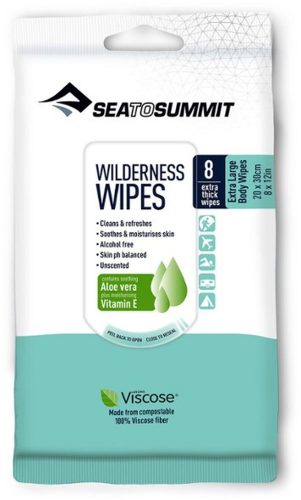
Wet (wilderness) wipes
I bring a few wipes per day to use as toilet paper to keep extra fresh and clean. They’re also great for the overall body (aka the wilderness shower). The best option is unscented to avoid attracting wildlife. Don’t forget to put these into the bag with your used TP and pack them out.
Navigation equipment
Navigation is directly correlated to safety. It’s important you know where you’re going and how far you have left to go, or else you can wind up in serious trouble. Don’t be that guy. Make sure you have a printed map and perhaps consider these other navigation tools.
Essential
- Topo map
- Smartphone GPS / hiking app
- Compass (and know how to use it)
Optional
- Satellite messenger / communication device
Navigation tips
- Check the weather right before you head out to make sure you’re prepared
- Obtain necessary backpacking permits
- Call the ranger for trail conditions and regulations
- Prepare two itineraries – give one to a friend and leave one under the seat in your car
- Download driving directions for offline use since you’ll probably lose reception as you get closer to the trailhead
- Download maps ahead of time while you have service
- Take photos of maps with your phone (but don’t rely on this in case something happens to your phone)
Topo map
This is the bare minimum in terms of necessary navigation. A printed map (ideally in a waterproof bag or Ziploc) is one of the 10 essentials. It’s nice to have photos of maps, trails, or guidebook pages on your phone, but in case something happens to your phone or its battery, always, always carry a printed map.
Smartphone GPS/hiking app
Lots of hiking apps can also act as a GPS with downloadable maps so they’re saved on your phone and still accessible when you don’t have reception.
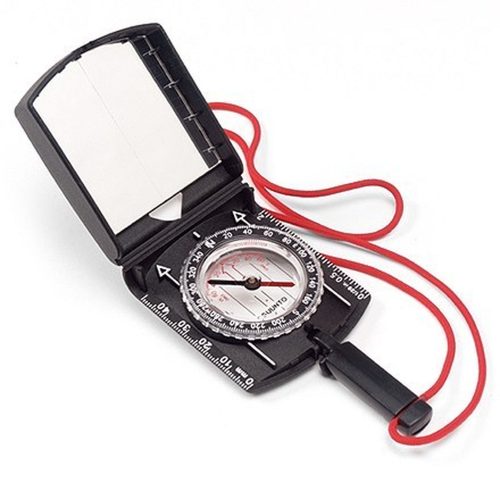
Compass
It’s one the 10 essentials, and you better be sure you know how to use it.
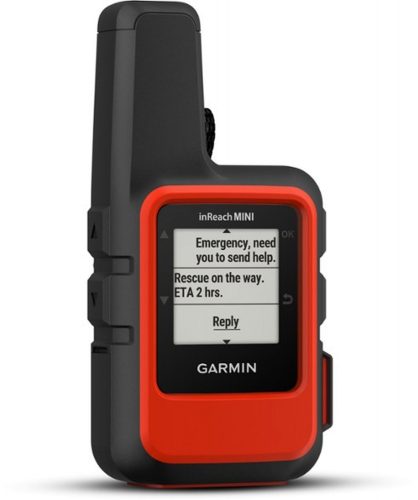
Satellite messenger/ communication device
This is a good idea especially if you’re headed out on a solo trip, but even with a group. A communication device or a personal locator beacon will help you get in touch with someone in case of an emergency.
Emergency/repair kit (gear) and First Aid kit (humans)
Whether you buy a pre-assembled First Aid Kit or make your own, this is another one of the 10 essentials. Hopefully you and your gear hold up, but in case you run into any issues, these emergency items can really save your ass.
Essential
- Band-aids of various sizes
- Antibiotic ointment
- Gauze pads
- Repair kit for sleeping pad and stove
- Duct tape (save weight by wrapping tape around a tent pole or water bottle)
- Waterproof matches
- Backup lighter
- Backup water treatment pills (Chlorine Dioxide)
- Whistle

Moleskin
This is hard for me to put in the optional list because it’s a necessity for me. Moleskin is a lifesaver if you get hotspots or blisters and something I never go on long hikes—let alone backpacking trips—without.
Entertainment (optional)
- Book or kindle
- Cribbage or dice
- Notebook and pen
- Headphones
- Camera
- Compact binoculars
Pack in your car (essentially optional)
- Clean clothes and shoes to change into
- Gallon of water for a trailhead shower, if you can’t wait to get home
- Camp towel to dry off
- Water and snacks to rehydrate/replenish immediately
- Parking pass
- Itinerary in your middle console or under your seat
Leave No Trace
Leave No Trace is a non-profit focused on outdoor ethics and educating people on enjoying the outdoors responsibly. There are Seven Principles to help minimize impact whether in the backcountry or your everyday hiking trail. These principles cover everything from packing out whatever you bring in and disposing of waste properly to respecting wildlife and fellow outdoors people.
Download and print the PDF packing list
